

Integrating NetDocuments with Draftable is the first thing a firm asks about after switching from Litera Compare (formerly Workshare Compare) to Draftable Legal. The question is usually phrased the same way: can attorneys still right-click two versions in NetDocuments and get a redline without downloading anything first?
Yes. But it takes configuration in two places — the NetDocuments Admin Console, which only IT can touch, and each user’s copy of Draftable Legal, which they connect themselves.
Here’s the whole setup, split by who does what.
What Integrating NetDocuments with Draftable Actually Gets You
Once it’s in place:
- Comparisons launch from NetDocuments – Select one or two documents, right-click, and send them straight to Draftable Legal. No saving to the desktop first.
- Version selection without hunting – Draftable can pull the two most recent versions of a document automatically, or open a picker when there are three or more.
- NetDocuments browsing inside Draftable – Users who start in Draftable can browse Cabinets and Workspaces from the New Comparison window instead of digging through Windows Explorer.
- Redlines save back into the matter – the output is added to NetDocuments as a new document or a new version of an existing one, so the comparison lives with the file it came from.
That last one matters more than it sounds. A redline that lives in someone’s Downloads folder is a redline nobody else on the matter can find.
Before You Start
- This is Draftable Legal, the desktop application — not the browser-based Draftable Online.
- ndOffice must be installed and signed in on each user’s machine. Draftable authorizes through ndOffice, not through a separate login.
- You need Admin Console access in NetDocuments to complete Part 1.
- The setup is per Cabinet. If your firm runs separate Cabinets for different offices or practice groups, you’ll repeat Part 1 in each one.
Part 1: What IT Needs to Do
Step 1: Log In to NetDocuments as an Administrator
Step 2: Open the Admin Console
Click your name in the top right corner and select Admin.
Step 3: Select the Cabinet You Want to Integrate
Step 4: Click Integrate with External Application
It’s in the menu across the top of the Cabinet settings.
Step 5: Check the Draftable Apps You Want to Enable
Scroll to the Web applications section and check the boxes for the Draftable entries. There are four, and they do different things — see the next section before you check them all.
Step 6: Click Save
The button is at the bottom of the screen. Repeat Steps 3 through 6 for every Cabinet that needs Draftable.
Which Draftable Apps Should You Enable?
- Draftable Compare – Required. Without it, users can’t select files from or save outputs to NetDocuments. It loads the selected document into the newer side of the comparison.
- Draftable Compare Versions – Loads both versions when a document has two, and opens a version selector when it has three or more.
- Draftable Compare Latest – Loads the two most recent versions of the selected document.
- Draftable 1-Click Compare – Takes two selected files and runs them through a preset comparison workflow with no further prompts.
My recommendation: enable Draftable Compare and Draftable Compare Latest for everyone. Those two cover the way attorneys actually compare documents — this version against the last one. Add Draftable Compare Versions if your firm works on documents that go through a dozen rounds, and hold off on 1-Click Compare until users are comfortable with the others, since it skips the screen where they’d catch a mis-selected file.
Every app you enable adds an entry to the right-click menu. Four entries on a menu an attorney uses twice a day is three too many.
Part 2: What Each User Connects Once
Each attorney or assistant does this on their own machine, and only once.
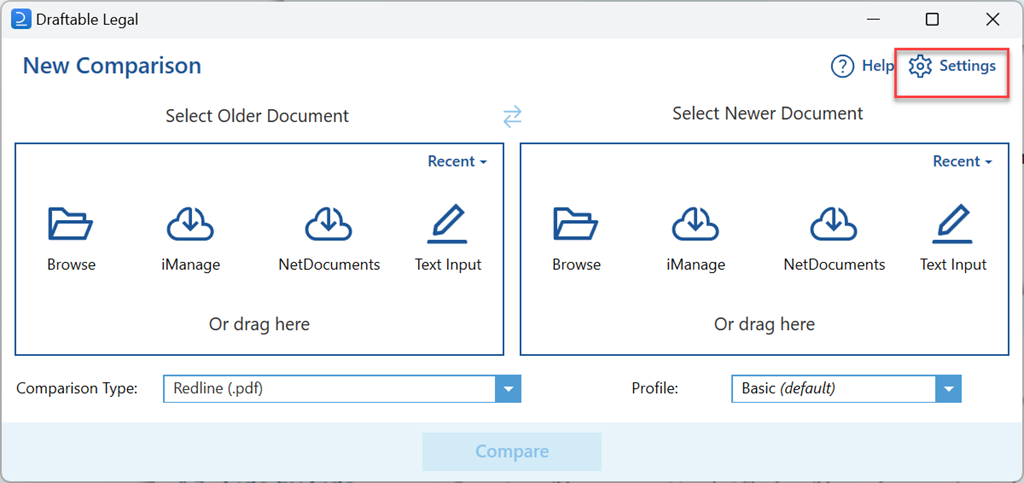
Step 1: Open Draftable Legal Settings
Click the gear icon in the top right of the New Comparison window.
Step 2: Open DMS Connections and Expand NetDocuments
Under the Integrations group, click DMS Connections, then expand the NetDocuments row. On versions before 26.6, this is a single Enable NetDocuments integration checkbox in the Integrations section instead.
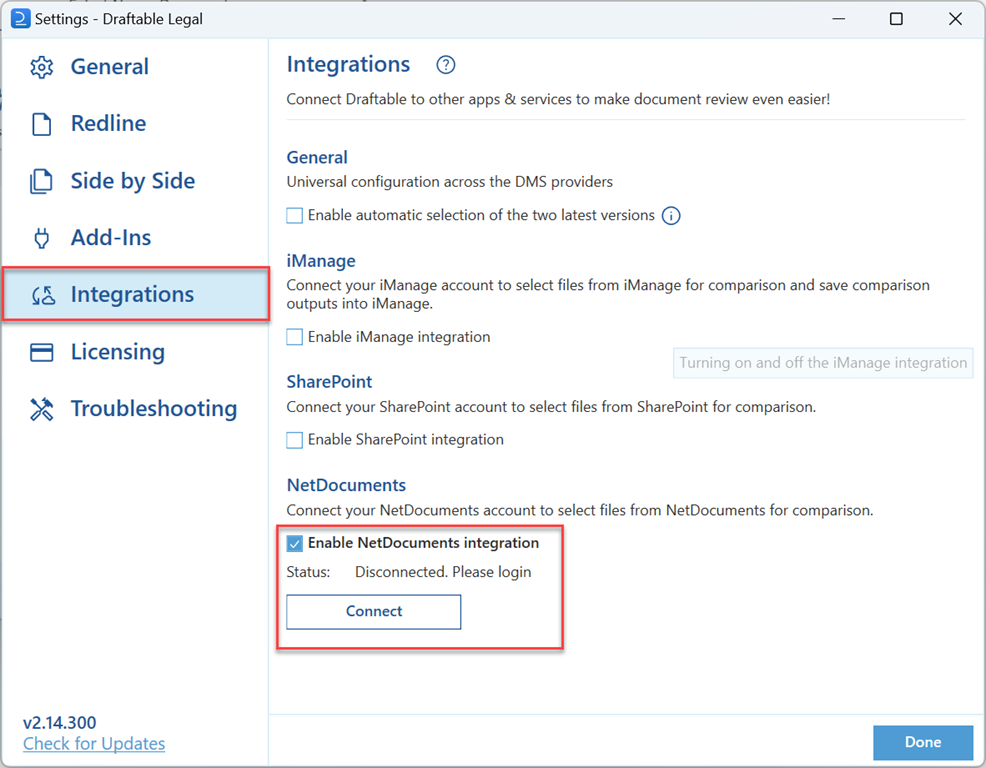
Step 3: Turn On the NetDocuments Toggle
The toggle has to be on before the Connect button will do anything.
Step 4: Click Connect and Sign In Through ndOffice
Draftable hands off to the ndOffice Activity Center. If the user isn’t already signed in, ndOffice will prompt for NetDocuments credentials.
Step 5: Click Allow in the Browser Window
NetDocuments opens a browser window asking whether Draftable can connect to the account. Click Allow, and the Settings screen will show the connection as active.